Hello everyone. In this tutorial we will present the import of the cadastre and more generally that of a plan in the form of an image and then scale it.
I remind you that the main part of this tutorial can be found in this video on our Youtube channel:
To get the cadastre, we have to go to “geoportail”. We will type in our address. Once the address is found, we zoom in and we see that we have a pink dot. It corresponds to the place we are interested in. We will then click on the left on the cadastral parcels to see the cadastre. We zoom in again. We switch to full screen by clicking on the small icon.
By pressing “apple Shift capt” on the Mac to take a screenshot. You will then see that the cursor turns into a small viewfinder. It allows to capture an image that is now on our desktop. If we are on pc, we will go to the start menu and type “capt”. There is then a program built into Windows called screen capture that will allow us to do exactly the same thing.
We return to SketchUp. We go to “File/Import”. We choose “all supported image files” and “use as image”. For pc, this selection tool is located on the right.

And here we’re going to choose our cadastre that we just made. We’ll then click and click to give it a scale factor. This will be imported as an image. An image cannot be resized. We can’t go in. This is not practical so we’re going to right click “Explode”. Once we’ve exploded it, we click on it again and we right click “Create Group”. So we explode it, we double click and we create a group.
Now, what’s nice is that we’ll be able to go inside. For example, we’re going to take a dimension that we already have (by clicking on each side). We see that our coastline is, for example, 77100.5 meters. We will then go inside our cadastre. This is a very important step. We must not forget that we are going to scale up the group. If we are not inside the group when we do a scaling, we will do it on the whole model. So this is a way to break the whole model.
Then with a click we type in our 77100. This is what was explained in the tutorial on importing components. This is the same method. SketchUp asks us if we want to resize the group or the active component. We answer yes. Then we press the space bar, we click outside. We take the “move” tool, click and release. Then we’ll come and position the corner of our building precisely.
We’ll see that there’s a little problem with the orientation. This is quite common. This is because in Google Maps, the north is often not the same as in other software. So we often make a small rotation in order to be perfectly aligned.
To finalize this, we’ll go to “Window/Layouts” and in it we’ll click on plus (+). And we’re going to call it, for example, “cadastre”.
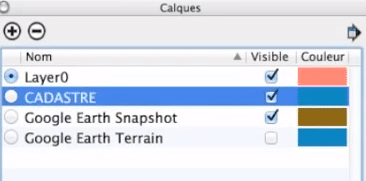
Then we right click on the entity of our group (and only our group). We go to the drop-down list and check cadastre.

So we have put our cadastre on a map called cadastre. And we can decide to display or not our cadastre to have our cadastral parcels or not and be able to work simply.
Please leave your opinion in the comment below.