components
In this tutorial we will look at components. At first sight components behave like the groups we have seen here: SketchUp tutorial | groups.
The main part of this tutorial can be found in this video on our youtube channel:
Components behave like groups as far as modifying them is concerned: once created, you have to enter the component to modify it. Creating a component is similar to creating a group. You select what you want to become a component (triple click with the selection tool) and you right click on your selection and you choose “create a component”. You can also use the keyboard shortcut “G” or the icon on the right of the selection tool. From there, you should have a window that opens and asks you for several pieces of information.
.
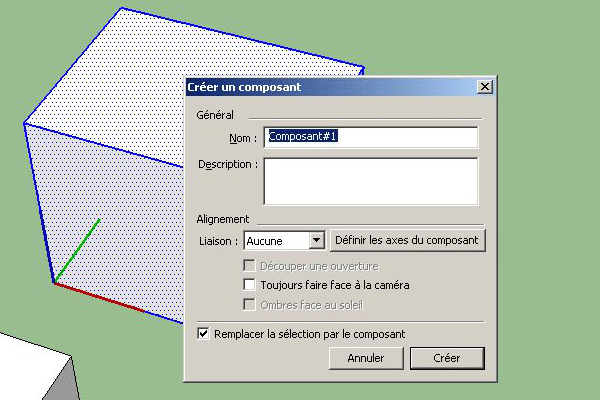
In this window, the first thing we see is that we absolutely need a name for our component. You can add a description. For now we won’t bother with the rest of the options. Once we’ve chosen a name, we’ll click on “create”. You will notice that once created the component looks very much like a group, you have to double click to modify it, it does not adhere to other entities etc…
Of course the component is not just a simple group to which we have to give a name. When we duplicate a group, the new group becomes a separate entity. On the other hand, when we duplicate a component, we don’t really make an entity totally disconnected from our original component. Indeed, when we modify our component (by entering it) it will modify all the copies of this component. Here is the big difference between the two.

To make this image I duplicated a group (in yellow) and a component (in red) and for each copy I made a hole with my circle tool and the push/pull tool. As you can see the first group was not affected by my hole, but my component was affected by this change.
In our next tutorial we will see the component window and the 3D image bank.