The groups
In this tutorial we will look at one of the most basic things in SketchUp: groups. We will see components that are similar in some ways in a future tutorial.The main part of this tutorial can be found in this video on our youtube channel:
When I say it’s fundamental I’m not exaggerating, you will constantly use groups. Indeed, groups allow you to separate entities from each other, in other words you will cancel the effect of adherence of geometries that we have seen here : SketchUp tutorial | adherence of geometries in 2 dimensions.
With a small example, we will see why using groups will become crucial for us. Let’s imagine that I want to put a sofa (which I will represent by a parallelepiped) attached to a wall. If I don’t make a group the sofa will “merge” with the wall and when I move it the wall will go with it. You will notice that to move the sofa away from the wall we have to force the inference on the red axis (by pressing the right arrow).
Now we will repeat the operation by making the sofa a group. To do this we need to select what we want to make into a group (triple click with the selection tool) and we right click on this selection. In the contextual menu that appears, we will choose “create a group”. And there you have it, your first group. You will notice that it has changed, when we select it, its edges become blue to indicate that we have selected our group. Now we can try our operation again: move our sofa against the wall and then move our sofa.
This time to move our “sofa” from the wall we did not need to force the inference on the red axis because SketchUp understood that the sofa was a different entity from the rest of our apartment.
Now that we have made a group, we cannot modify it as we normally would. If you try to make a hole in a group with your “rectangle” tool and your “push/pull” tool you will see that it does not work. In fact, since it is a different entity from the group, it no longer communicates with the group. To modify our group we will double click on it, or we will right click and select “modify group”. Once you have done this you will see that the other objects next to it take on a greenish tint, this indicates that they are no longer accessible. Your group, on the other hand, gets a sort of dotted “cage” around it. This shows that what is inside is part of your group.
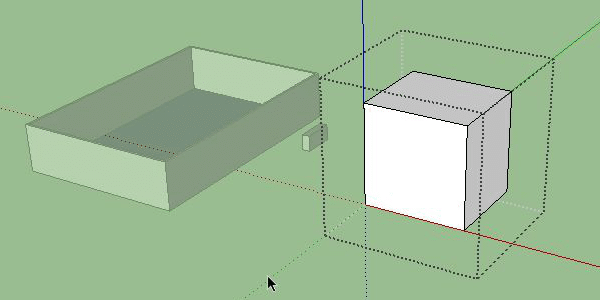
Once you are in the group you can make your changes without affecting the “grayed out” objects. To leave the group, you can press the “escape” key on your keyboard or click outside the group with your selection tool. The difficulty you will have with groups is to be in the group to make your changes. Of course you can make several groups in your SketchUp file and I strongly encourage you to do so in order to avoid unintentionally modifying the other objects in your model.
In the next tutorial we will see the use of components, you will see that it is very similar to groups but with some interesting features.