Hello,
For those who follow the Facebook page, you have already seen the 3D model of this tank. This post presents its realization:
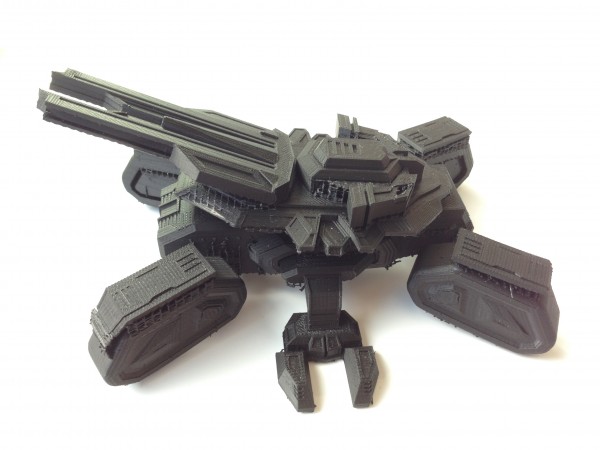
INSPIRATION
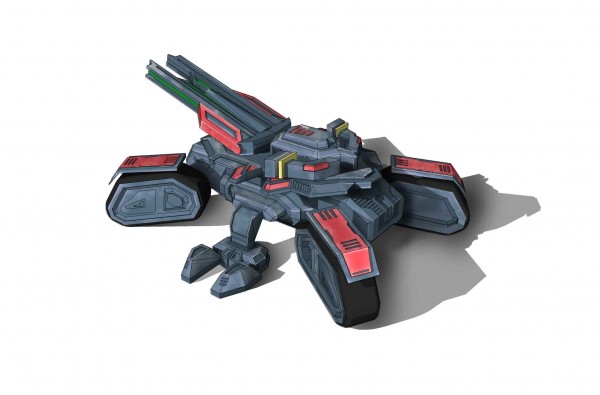
To make the model; I first searched on the internet different images of my model. Below, the image I used the most for the modeling.

Tanks Starcraft
Modeling in Sketchup of large volumes
Mon expérience de la modélisation pour impression 3D m’a montré qu’il fallait mieux travailler sur plusieurs petites pièces plutôt que sur une grande. De plus, le tank étant en grande partie symétrique, j’ai utilisé des “composants” “retourné le long de ” pour ne dessiner que la moitié du tank.
La première étape consiste donc à créer les grands volumes constitutifs. J’ai utilisé en grande partie des cubes groupés en composant afin de définir les proportions générales du modèle.
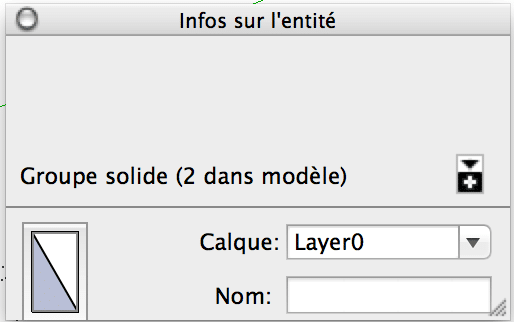
The obsession with the solid component.
Pour chaque composant, il n’y a qu’un seule obsession à avoir c’est que le composant reste solide. Je garde donc la fenêtre “info sur l’entité” ouverte en permanence afin de contrôler à la fin de chaque opération que le composant reste solide.
Adding details
Sous Sketchup, les détails ont été réalisés à l’aide des outils standard de Sketchup et des plug-ins suivants (merci Fredo6 encore et encore):
- tool on surface
- joint push pull
The little Photoshop pleasure
Once the model was finished, I couldn’t resist a little computer graphics in Photoshop
3D printing
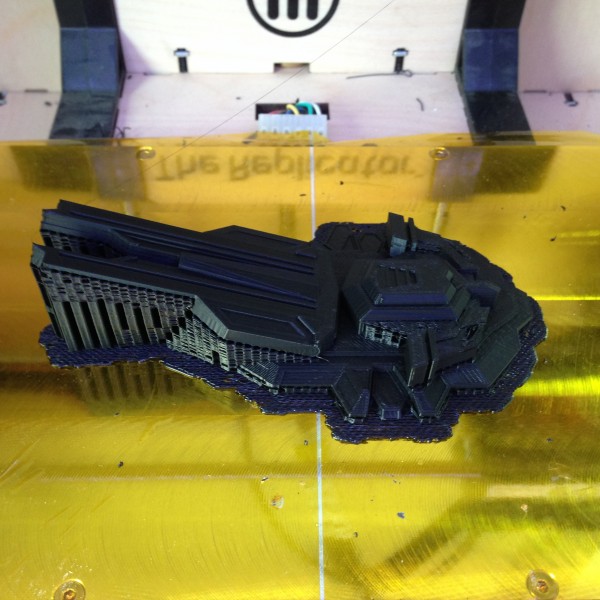
I then exported my model to STL using the warehouse extension plug-in. I made a first attempt to print the model piece by piece. Unfortunately, the assembly pins were too small. So I chose to print the model in 2 parts, the bottom and the top.
In makerware, I printed the models at a scale of 25% in high quality with support and raft in abs on a plate at 115°.
The STL files are downloadable http://www.thingiverse.com/thing:239225
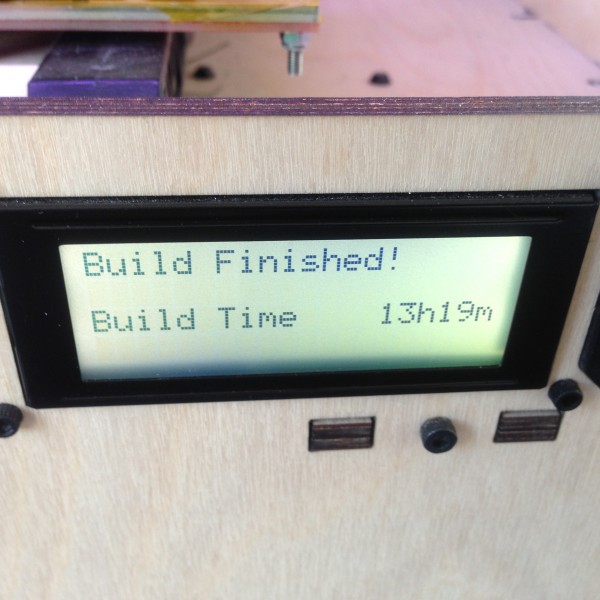
The printing took 14 hours for the bottom and 4 hours for the top.

The finishes
Voilà, il ne reste qu’à enlever le raft et le support à l’aide d’aide cutter et d’assembler les 2 parties. J’aurais bien poncé et peint ma petite maquette, mais mon fils me la confisqué ! Dommage, ce sera pour une prochaine fois.

Conclusion
The conclusions of this small project:
- Always use small group or component when modeling. they can be merged afterwards with Sketchup solid tools,
make assemblies of printed parts only when:- you want to make moving parts,
- the support will be too difficult to remove,
- the model is too big
- Make large assemblies,
- Print with a lower fill for large parts.