Hello,
Adebeo shares with you its new plugin for planners that allows to quickly draw buildings to illustrate a project.
To install the plugin you can see the procedure on this help page : https://help.sketchup.com/en
The purpose of this plugin is to allow you to quickly build simplistic style buildings to showcase your model. To illustrate this, here is a simple example: I took a building from the 3D image bank and then I added buildings around it thanks to the plugin to enhance it. Here is the result:
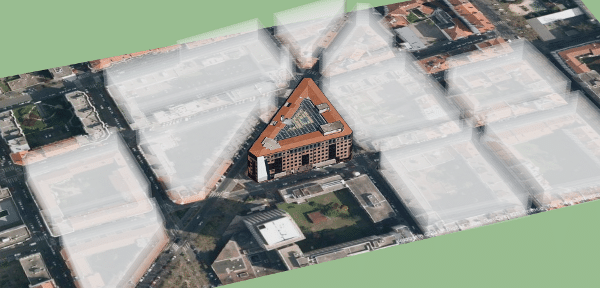
(you can click on the image to enlarge it)
Voici le rendu 3D de ce que donneHere is the 3D rendering of what my little test gives:
Of course the rendering is not the same as in SketchUp but it is to give you an idea of the result.
You can see on the image buildings with transparency, these are the ones that were created with the plugin. There are several styles available, the one I used is called “cloud” and as the name suggests the effect is a bit cloudy. You can set your building style in the plugin window.
The use of the plugin is extremely simple. You make one face per building you want to create, select the faces and click on the plugin button: 
If you don’t see the button, you can add it by going to the view menu, toolbar and you must check Quick building.
For my example, I got the building from the 3D image bank, then I got a piece of map from Google Earth (I will explain in a future tutorial how to do it) to put it in its environment. Then I made my faces by putting me in top view to see the different buildings around and here is what I had before using the plugin:
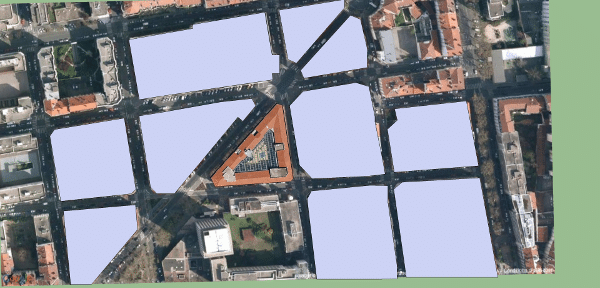
As you can see, I drew roughly the faces above the existing buildings. I then selected my faces, clicked on the plugin button, then chose “cloud” from the list of styles. I left everything by default and then I launched the plugin by pressing the “Go!” button and the result you know it.
Let’s have a look at the plugin configuration window that opens when you click on the button.
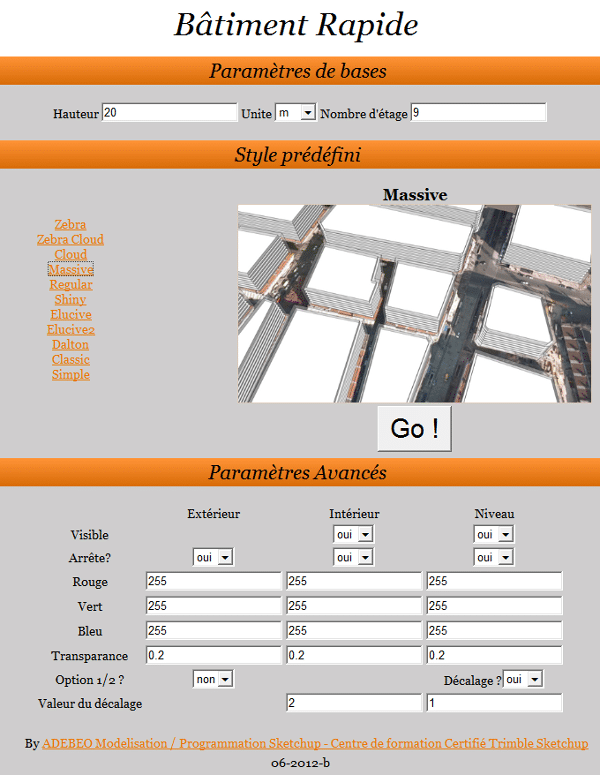
So we have the “Basic parameters” part which allows you to indicate the height of the building (according to the chosen unit) as well as the number of floors of the building.
In the part “Predefined style”, as its name indicates, you have the choice between several styles. This is where I chose “cloud” which gave me the look I got. By changing the style, you will see a preview image on the right of what it gives.
Once you have chosen the style, you can press the “Go!” button to create your buildings.
Otherwise, you can adjust the “Advanced settings” which allow you to make your own style. You can notice that when you change the predefined style the values of the advanced parameters change. In these settings we have three columns that allow you to change the values either from the outside, the inside or the levels. The “Visible” option allows you to hide or not the interior and levels while the “Stop” option asks you if you want to see the edges or not.
You can also assign colors, for this you must indicate the color according to RGB channels: “Red Green Blue”. This will evolve to a simpler solution but in the meantime you can go to this site: http://www.colorpicker.com/ choose your color, then you will have the 3 values you need R for red, G for green and B for blue.
So you can change the color of your building, I put the 3 colors to show you the possibilities and the difference between exterior, interior and level, it is obvious that you are not obliged to do the same:
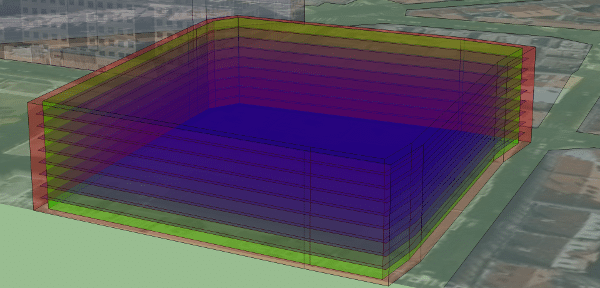
The 1/2 option allows you to display only one level out of two, to give a different style to your building.
The offset option allows you to adjust the offset between the exterior wall and the rest, whether it is the levels or the interior.
Please give your opinion in the comment below.