Push/pull tool and meter
In this tutorial we will learn how to add a 3rd dimension to our 2D plans. To do this, we will use the “push/pull” tool. We will also see the meter tool, which will allow us to place guides.
You can find the main part of this tutorial in this video from our youtube channel:

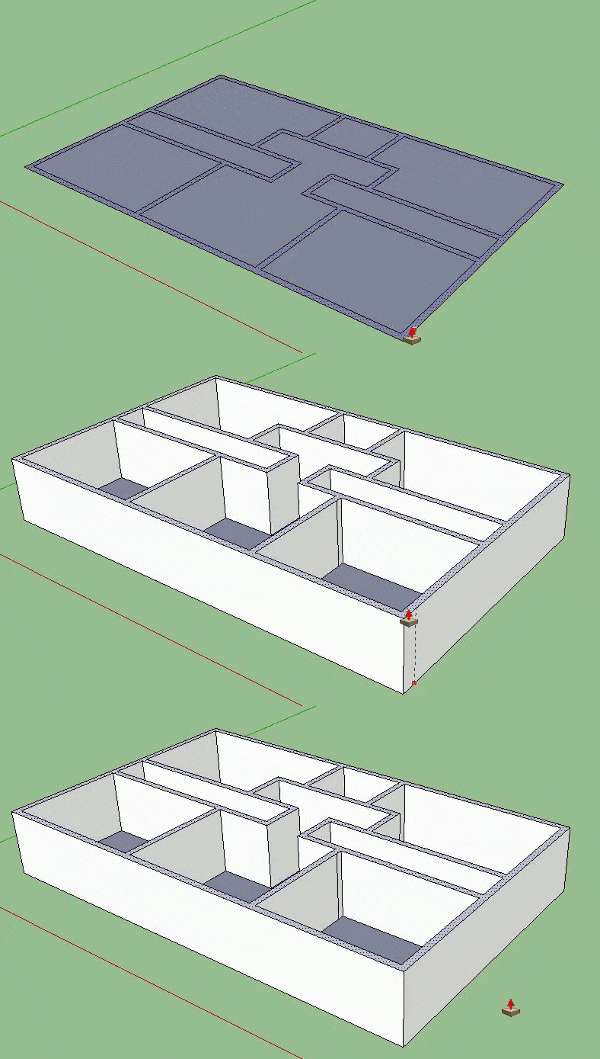
Like many SketchUp tools we can use “push/pull” in two different ways: by first selecting the face we want to add volume to or without selecting. As with the offset tool we saw in our previous tutorial, I recommend that you select what you want to add (or remove) volume from.
The tool works in a very simple way: you select the face, you click on your “push/pull” tool (keyboard shortcut “P”) and you make a single click. You give the direction you want your volume to go and you make another click, or you give a measurement and you press the “enter” key on your keyboard. You cannot select several faces at once and use this tool, this is possible with a plugin. To build the walls of an apartment, the easiest way is to have only one face for your walls, hence the interest to erase the excess lines.

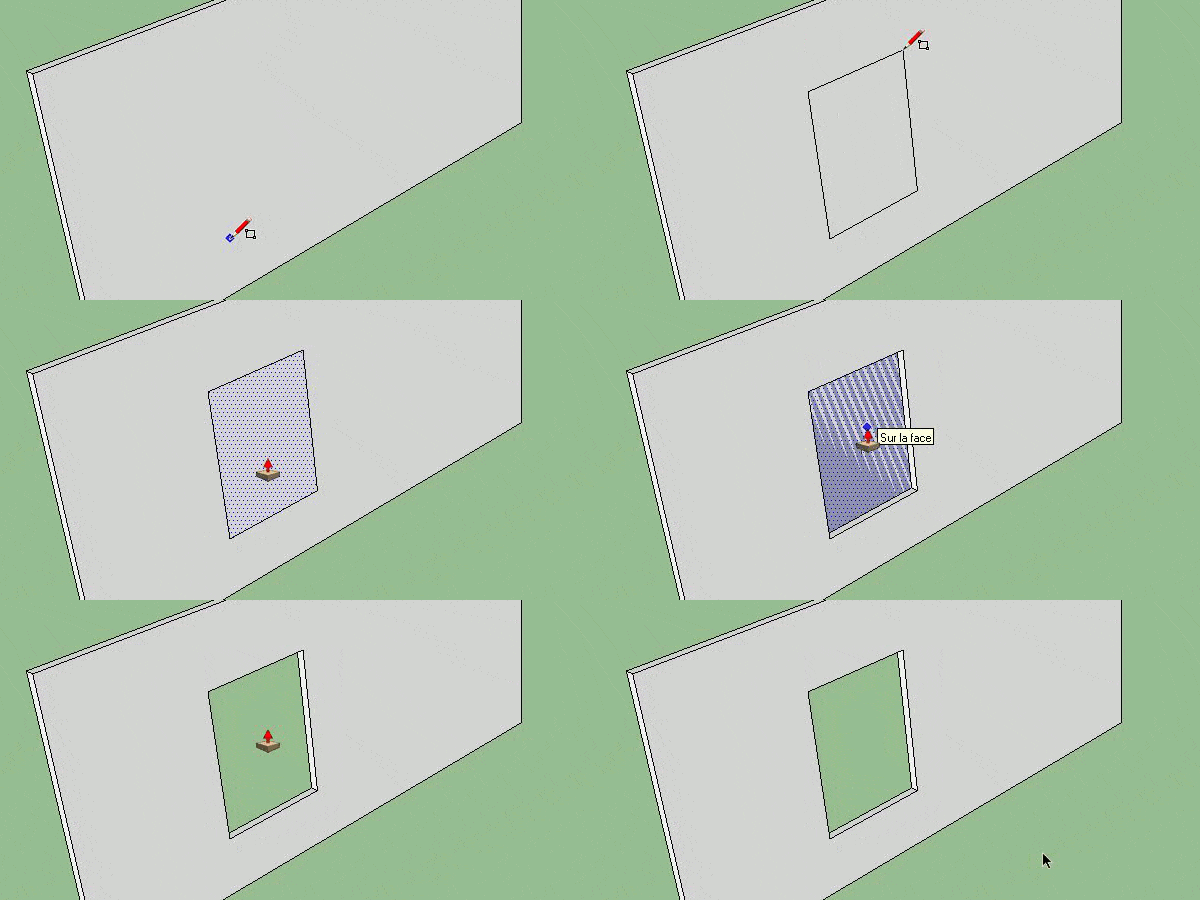
We have seen that the “push/pull” tool can create material, but it can also be used to remove material. We will use it to make an opening. To do this, we will make a rectangle on a wall. Then we select our face created by the rectangle: we take the “push/pull” tool and we click on the face. Then we will look for the face behind or else to be sure to click where it is necessary, we choose a point or an edge which is behind. This way SketchUp understands that we want to remove material, and instead of making two superimposed faces, it simply removes the material.

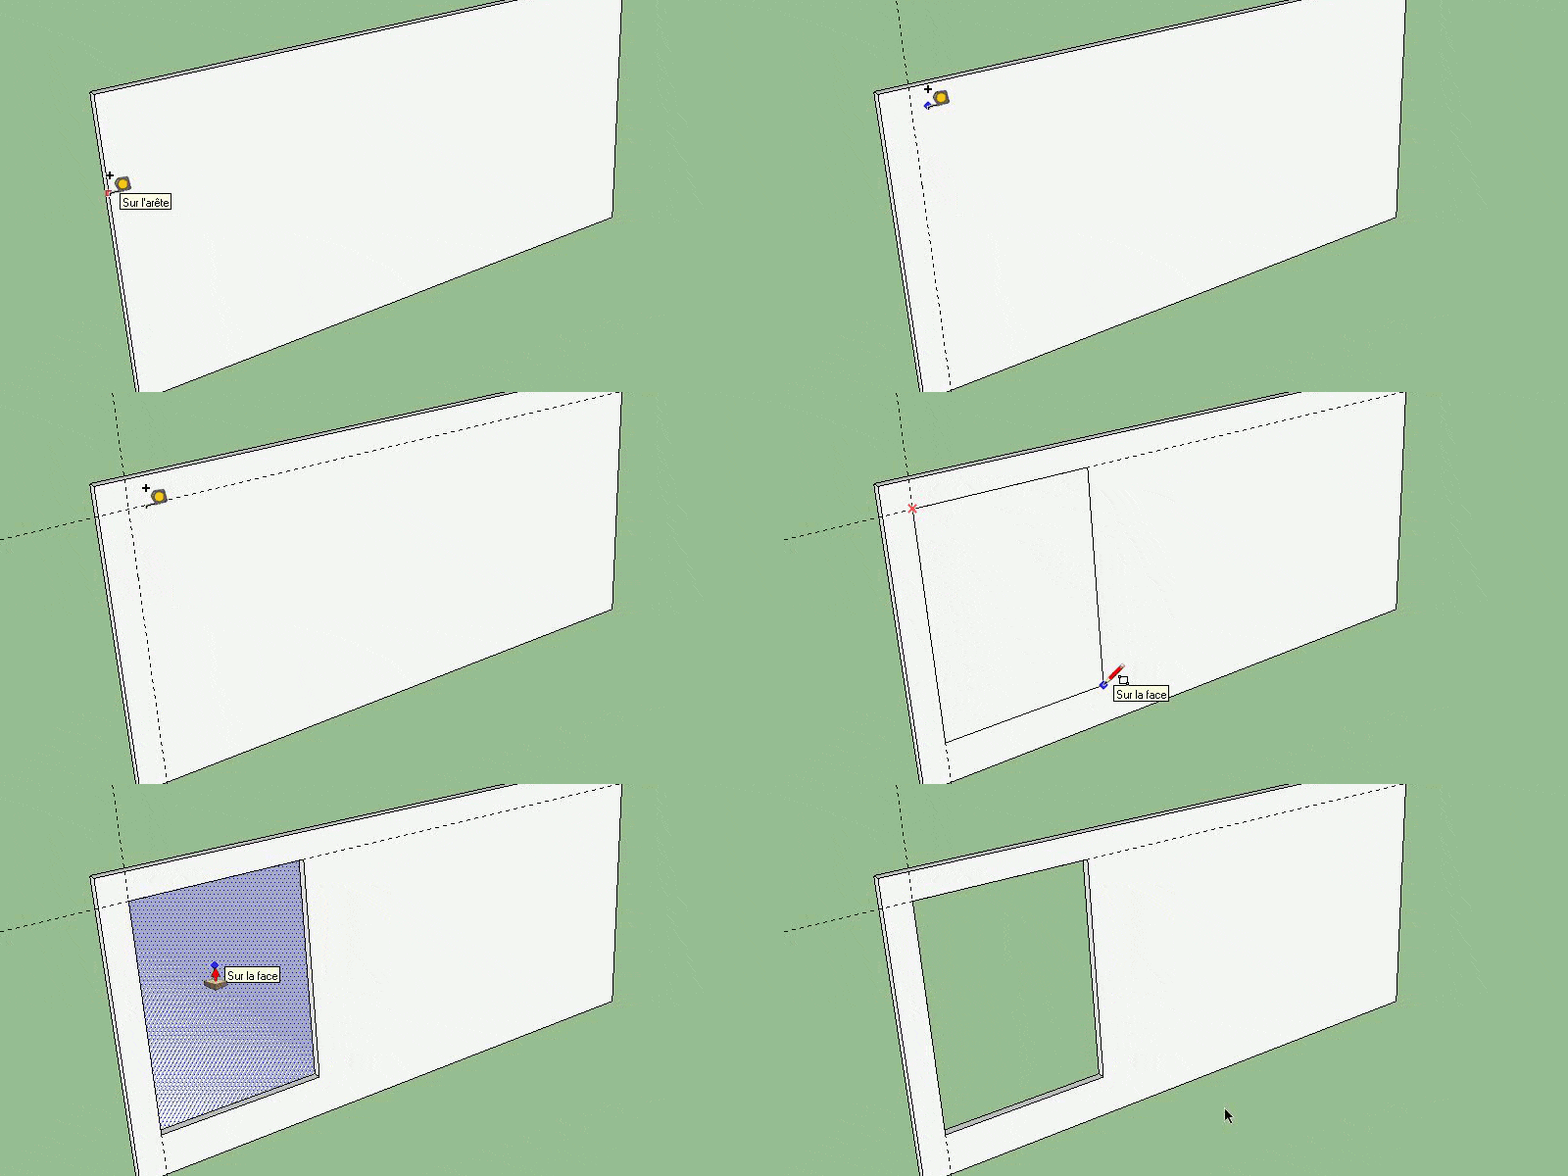
Now we will see how to put our window exactly where we want it. To do this, we will use the meter tool which will allow us to put guides.

The Meter tool can be used to measure dimensions. To do this, simply take the tool (keyboard shortcut “T”) and click from one point to another to see the length between them. But what will interest us is the use of this tool to place guides. To do this, we’ll look at an example. Let’s say we want to put our window 30cm to the right of the wall, we take our meter tool and we click on the edge of the wall and we give the desired direction. Then we enter our dimension: “30cm” and we press the “enter” key. And here we have our guide. Now we can make our window following this guide.

In our next tutorial we will see other features of our push/pull tool.

