Hello everyone! In this new tutorial, we will see how to insert a SketchUp model in Layout to make a scaled plan.
The main part of this tutorial can be found in this video on our Youtube channel
The first thing to do is to prepare our SketchUp model. In the model of this tutorial, we can see that scenes have been prepared. These scenes represent each of the views that we will want to find in Layout. We have all the facades (in parallel projection), the top views, a 3D view, a landscape overlay… After having prepared all our views, we go to “file/save”. Then, once the file is saved, we go to “File/Send to Layout”. Layout starts and asks us to choose a default template.
In our last tutorials, we saw how to make a cartridge (I refer you to this previous tutorial). We will then choose the template we had previously made. Our plan is displayed blank but inside we see that we have a view of our SketchUp model. With the “selection” tool, if we click and drag, we can make a change to the SketchUp view. Then, if we click and drag on one of the corners, we see that it resizes our view. Because when we select the model (in blue) and we go to the “View” tab of the “SketchUp model” tool palette, we have the “Keep Scale” cross not checked. If we check “keep scale when resizing”, you can see that when we change our viewpoint or our windows, it will crop the view. Do not hesitate to “play” with this little cross to understand how it works. We will uncheck it for this tutorial.
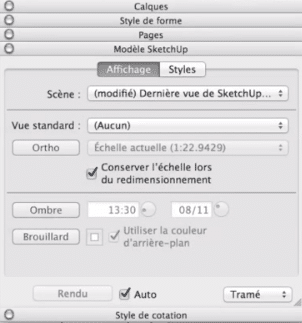
Another important element, instead of using the “Last saved SketchUp view” scene, we will go to “Overlay 1”. We choose well in the tab “scene” and not in the tab “standard view”. In fact, in our SketchUp object, we could put any view of SketchUp even a view which is not in a scene. It is enough to double-click, and then for example to change the viewpoint. On the other hand, this will lose its solidity. Explanation: when we modify our SketchUp model, we can update it in Layout directly. If you have used scenes this will be done very well and very solidly. If you have not used scenes but modify by hand, at this moment you risk to have losses in the modification.
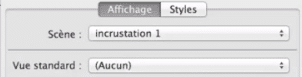
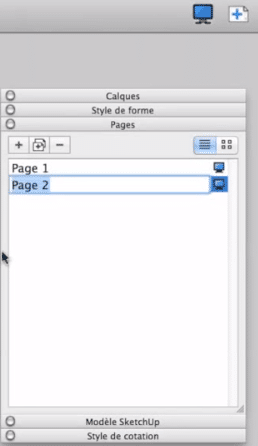
We come back to our scene, overlay 1. And we are going to position our model as big as possible on the page. Step 2 is to add a page. To add a page, there are several methods. By clicking on the little plus, or go to the “page” tool palette and click on the plus. We can then navigate through the different pages. We will select an item and do apple C, and apple V on mac or control C and control V on pc to paste.
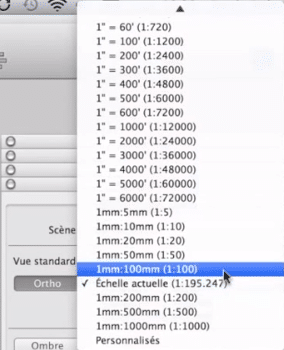
On our second page, instead of using the overlay scene, we are going to use the “west façade” scene. As it is much too big, we will reduce it. Ideally, we should put all the facades on the same page. We see that the scale is 1/195th. So we are going to switch to the 1/100th view. From the moment we are on an ortho projection, the box “keep the scale when resizing” is checked. This allows us to adjust our scene as well as possible.
Now we will see how to copy. Earlier we talked about copy/paste (with Ctrl C/Ctr V and Apple C/Apple V). But the most practical tool is the selection tool. Just hold down Alt on the Mac and Control on the PC, and we click and drag on our model. All that is left to do is to choose another front. For example, we select both, and we click and drag on our model. On the third and fourth view, change the scenes.
Once the views are positioned, we can change the styles. It is best to have them set up in SketchUp beforehand.
With our four objects, we’re going to be able to do a scale dimensioning. They are all 1/100th on A4. But we will see that in a future tutorial.
Please leave your opinion in the comment below.