Hello,
In this tutorial we will focus on the “selection” tool in SketchUp. The main part of this tutorial can be found in this video on our youtube channel
 The “selection” tool is the small arrow. Its shortcut is the space bar. By pressing it, you can go back to the selection tool. It is important to have this little space bar reflex because the “selection” tool can’t do anything stupid. If, for example, you have the “move” tool, you can always very quickly “break” your entire model and move your entire building. With the selection tool, however, this is never a problem.
With the selection tool, we can enter the different groups by double clicking on them. We can select by a single click that the window, for example. A double click will select not only the glass but also the face and all the surrounding edges. We also have another option, to do a triple click, which will select everything that is connected.
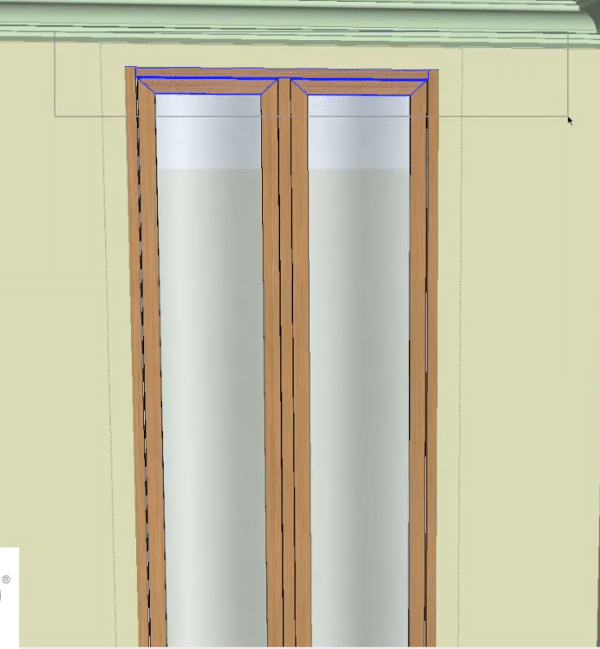
Then we have different options. We have the selection window which is like in many software (word, excel, autocad, photoshop, …), the selection window from left to right which allows to select everything that is 100% in the selection window (in our tutorial, you can see, that it concerns only the high crossings).
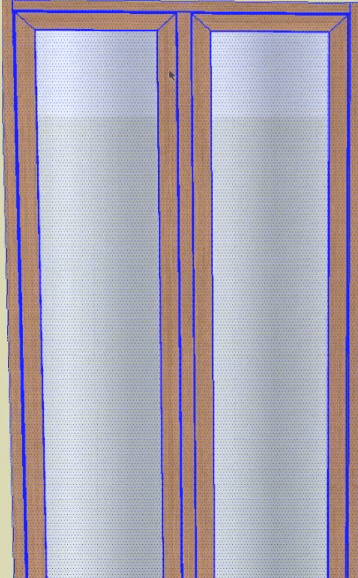
We also have the window from right to left. This last one will select all that passes through the window. At this point, we have selected the glass but also the jambs.
There are other keys to know for the selection. We have the “Shift” key. This will add items to the selection. And when we click on something that is already selected, it deselects it.
We have the “Alt” key on mac and “Ctrl” on pc, which allows you to do only more. It’s like the Shift key but when we click on something that is already selected, it doesn’t deselect it.
We can also hold down “Alt” and “Ctrl”. A little minus appears. On a PC, it’s not “Alt” and “Shift”, it’s “Ctrl” and “Shift”. Globally, every time you say “Alt” on mac, it corresponds to “Ctrl” on pc and vice versa.
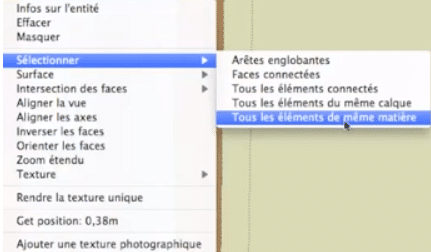
We also have other selection methods. For example, the right click “Select/ All elements of the same material”. Then we have selected all our wooden elements. Or we can also do, right click “Select/All edges, Connected faces, All elements of the same layer”… What will be very useful are “all elements of the same layer” when we are going to do Autocad import. Otherwise, “Bounding edges” will be used mostly.
As you will see, the window’s uprights are too wide. We will solve this problem by making a selection window from left to right. This way, we can select all the uprights. We’ll take the “scaling” tool, click and hold “Alt” on the Mac and “Ctrl” on the PC, and we’ll reduce the width of our uprights so that we have a better proportioned window. We take the selection tool and click outside.
An example: when we have large things to select, and we would like to select only the inner edges, except one. The solution would be to click with “Shift” but it is a bit long. So we double click and with “Shift” pressed we click on the edges we don’t want. This allows to select all the edges. This is a very common trick for doors, for example. We’ll make a selection on it and with “Shift” we’ll click on the face and then click on the bottom edge again. This allows us to make a shift of the door more quickly.
Please leave your opinion in the comment below.